One of the remarks the RDS Team got out was the difficulties IT departments had was the installation of the RDS components. It was unclear which components were needed/required and where they should be installed. Because Microsoft is aiming with RDS is created on the low complexity environments, it will become more important to provide clear guidance of the installation steps. The RDS team reacted on this remark by adding a complete new feature within the installation part for creating RDS Deployment Scenarios. In this article I will describe those scenarios and how they can be implemented.
Before we can start with the possible deployment scenarios you should be aware of the components Microsoft Remote Desktop Services (RDS) exists. So let’s start with quickly summarizing the available components. If you already have experience with Windows 2008 R2 RDS, you can skip this part and jump to the Deployment Scenarios section.
- Remote Desktop Session Host (RDSH)
The RDSH is the old original Terminal Services component known in earlier Windows releases. On the RDSH server you will install the client applications and users will set-up a session and use those applications. For a while beside the Remote Desktop Microsoft also offers the possibility to offer RemoteApps. With RemoteApps the users only sees the chosen application, without a full desktop. In Windows 2012 RDS you can also use access control to determine which user can start which RemoteApp.
- Remote Desktop Virtualization Host (RDVH)
This is actually a Hyper-V based host with additional logic, which will host the Virtual Desktop Infrastucture (VDI) machines, both stateful (each user has his own VM assigned) as stateless (pooled desktop) can be hosted by the RDVH role.
- Remote Desktop Connection Broker (RDCB)
The RDCB is the component that divides the users over the available RDSH machines (when using RDSH) and/or connects/assigns users to a VDI system. Microsoft has improved the RDCB functionality a lot during the latest release of Remote Desktop Services. You can compare the RDCB with (intelligent) load balancers.
- Remote Desktop Web Access (RDWA)
Remote Desktop Web Access provides an (web) portal where user can start the Remote Desktop and/or RemoteApps using a browser. The RDWA is also component, which will be consulted for showing/starting the applications to/from the users local Start Menu via the RemoteApp and Desktop Connection client component.
- Remote Desktop Gateway (RDG)
When it is required that the RDP protocol need to encrypted, so a full secure connection needs to be set-up the Remote Desktop Gateway comes into play. The Remote Desktop Gateway will encapsulate the RDP protocol into a SSL traffic stream. By default this component is used (together with the RDWA component) to provide an external access to a RDSH or a VDI infrastructure.
Now you know the main components within an RDS infrastructure we can start discussing the deployment scenarios available within Window Server 2012 for RDS.
Installation Type
In previous Windows version you installed RDS just like another component in Windows via the Add Role/Feature option.

When you start Add Roles and Features in Window Server 2012 you will see a new window asking the installation type. There are two options to select Role-based or feature-based installation, which will show the same interface as earlier Windows Server versions and Remote Desktop Services Installation, which will guide you through the RDS installation steps.
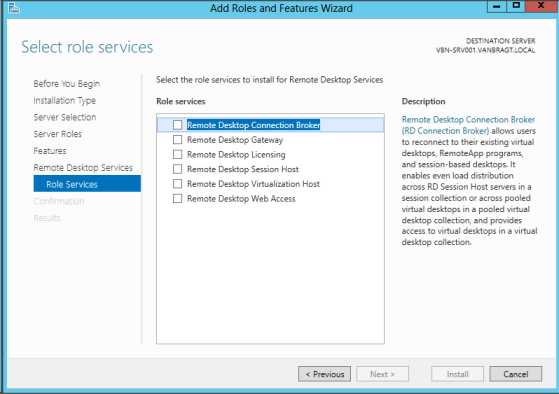
In you know what you are doing and still would like to use the role-based installation this is still possible, just select the Role-based or feature-based installation option and the familiar options will be shown.
In this article I will focus logically on the deployment options offered in the new Remote Desktop Services installation. Selecting the Remote Desktop Installation starts up the next decision moment called Deployment Type. At the deployment type again two options are provided: Standard Deployment and Quick Start. Quick Start will install all components (based on choices further in the process) on one single server. This is usable for test environment or quick Proof of Concept but will not be advisable to use for production environment. For production set-ups you would normally use the second option called Standard Deployment.
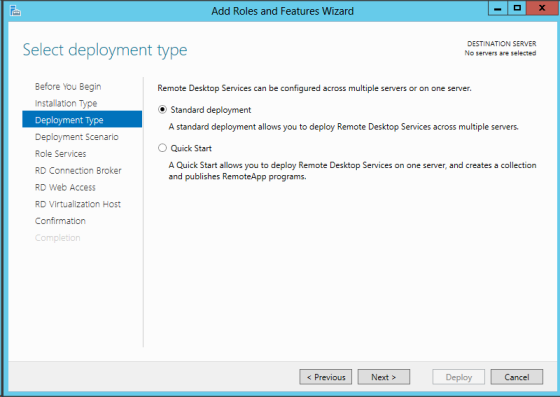
When using the Quick Start you mostly get the same options shown as the standard deployment, but logically you won’t have the option to select the servers where a component should be installed. For this article I will use the Standard Deployment to discuss the deployment scenarios further on.
After select Standard Deployment (also when choosing Quick Start) the most important question is being asked in the RDS deployment steps.
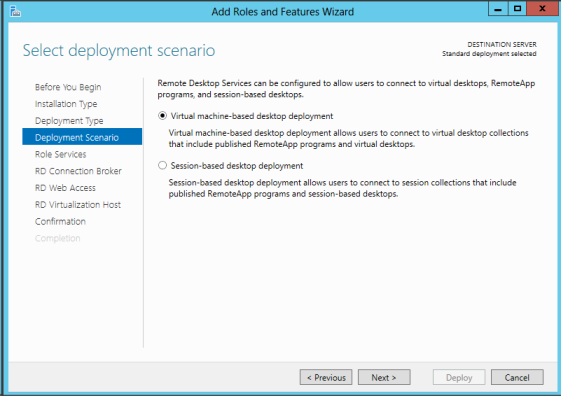
At the deployment scenario you choose which type of Remote Desktop Service you would like to deploy. Again you have two options to choose.
The first one is called Virtual machine-based desktop deployment. The virtual machine-based desktop deployment scenario will select the required components for setting-up/create a Virtual Desktop Infrastructure (VDI). A VDI infrastructure is based on client operating system like Windows 7, that’s the main difference with the other option. On this VDI both a Remote Desktop as a RemoteApp can be published, but because it’s based on client OS per machine only one user can be connected at once. A VDI can be pooled or assigned. Within a pooled VDI desktop a user will be pointed to a random system in the pool (in other words the user has no standard system in use). Normally those machines are protected against changes by the end-user and will be reverted to their default state when a user logs off the pooled VDI machine. The other VDI is a dedicated VDI for each user. When the user logs on for the first time an available VDI will be assigned to him. The next time the user logs on again, he will be forwarded to this VDI system again. By default this type of VDI will not be cleaned and keeps the state when the user logs off.
The second option is Session-based desktop deployment still known on the old name Terminal Services. With a Session-based deployment the operating system where the user starts his application on is the server operating system (Windows Server 2012 in this case). In other words more users are working on the same system sharing the available resources. Session-based deployment also offers the possibility to connect to a Remote Desktop or a RemoteApp.
Logically depending of which option you choose the next options will differ a bit (this part will not be shown in this when choosing a quick format), logically the RDVH (virtual machine-deployment) or the RDSH (session based-deployment) component will be shown.
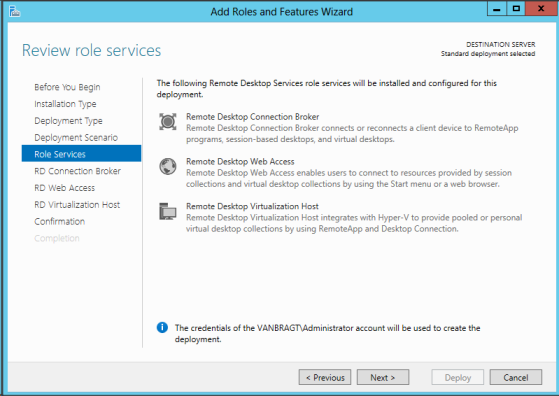
As you can see in the figure the Remote Desktop Gateway is never added to the infrastructure using the deployment wizards as this an optional component. The Connection Broker (RDBC) and the Web Access (RDWA) are required components and will be shown in each deployment scenario.
After this informational window you need to provide on which server(s) in your infrastructure the role will be installed (including all required features and roles for that component).
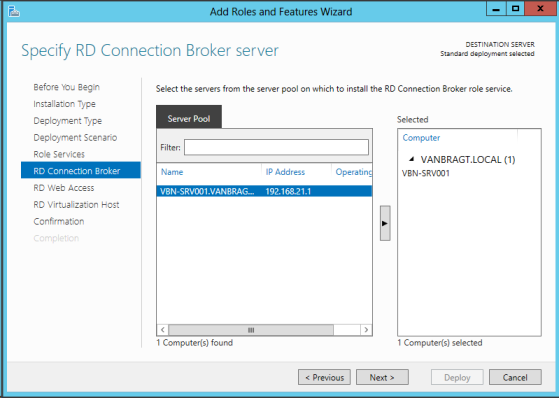
The wizard uses the new possibility to install roles and features to other servers (than the server you are working as this was the case in previous versions). This enhancement with Window Server 2012 makes it actually possible to add the RDS deployment scenarios to this layer.
Conclusion
By providing the RDS deployment scenarios Microsoft made it a bit easier to install the required components per RDS methodology. This arranges that the infrastructure of RDS becomes a bit less complex. However during the installation you still need to know which methodology you would like to use virtual machine-based or session based and that is actually the most difficult but relevant decision that should be made. Hopefully this article provides a bit more knowledge on the available RDS deployment scenarios.